Showing posts with label Gift Ideas. Show all posts

Wednesday, November 27, 2013

DIY Cupcake Carrier Gift


I love this latest idea from Sarah and Emily, from the blog Boxwood Clippings. They have great taste and are always coming up with simple and chic DIY projects. I love this simple gift idea and I think you will too! 
* * * * * * * * * * * * * * * * * * * * * * * * * * * * * * * * * * *


Hi everyone! We are so happy to be visiting today from Boxwood Clippings. Over at our blog we have a feature named ‘Holler Dollar’ where we post our favorite finds for a buck.
Today we’re happy to share our latest dollar find, which makes the most absolutely adorable and perfect gift for the Holidays.

boxwood clippings_$1 cupcake holder gift

Yep, we’re talking about that sweet little cupcake carrier from The Dollar Tree.
We made easy cupcakes from a cake mix and topped them with homemade buttercream and crushed soft peppermint (also from The Dollar Tree).

boxwood clippings_$1 cupcake holder gift

 Then we added some black tulle and a bow to finish it off.

boxwood clippings_$1 cupcake holder gift

One cake mix made 18 cupcakes, and filled two cupcake carriers making this one very inexpensive gift for co-workers, teachers, neighbors and friends!
For more Christmas ideas please visit us at boxwoodclippings.com
We wish you the happiest of Holidays! -Sarah and Emily xoxo


We are sisters whose goal is to have it all…balanced, organized and beautiful lives on a tight budget. Join us on our blog, Boxwood Clippingsfor daily tips on design, organization, bargains, DIY’s and much more


Tuesday, July 23, 2013

Easy Summer Gift Wrapping Ideas


I'm excited to have my contributors Sarah and Emily, from the blog Boxwood Clippings back with another great DIY project. They have shown us how some simple accessories can dress up simple kraft paper wrapping. 

* * * * * * * * * * * * * * * * * * * * * * * * * * * *

Today we are thrilled to share three of our go-to gift wrapping ideas for summer. We love big and bold wrapping and these little tips will have your gift recipients giddy before they even unwrap!


#1 Plastic Tablecloth Pom-Poms

We have been loving plastic table cloths to use for gift wrap because it is so inexpensive and unbelievably versatile. Our favorite use is making big pom poms to adorn a simple package. For DIY see below…

#2 Flowers and Greenery

Our second idea is using silk flowers and greenery. We love to buy pretty fake flowers and greenery when they are on sale and clearance at the craft store. One bunch will go a long way, and will make any ordinary wrapping extra special. Super easy and very pretty!

#3 Headbands

There are so many cute headbands and hair clips everywhere lately that are too cute to put inside a gift box! Any chance we get, our little girl presents will be topped with a pretty headband. Nothing beats wrapping that is functional too!
………………………………………………….

DIY Plastic Pom-Poms

You will need plastic table cloth, ribbon and scissors.

boxwood clippings_3  creative ways to giftwrap

First, cut a section of your tablecloth and fold accordion style.
We usually start with a double layer of tablecloth for a fuller pom-pom.

boxwood clippings_3  creative ways to giftwrap

boxwood clippings_3  creative ways to giftwrap

Next tie a knot with ribbon around the center of your pom pom.

boxwood clippings_3  creative ways to giftwrap

To finish, simply pull out the layers of plastic and adjust until you’re happy with the pom-pom.

Picture 27

boxwood clippings_3  creative ways to giftwrap

VoilĂ !

boxwood clippings_3  creative ways to giftwrap

………………………………………………….
We hope your summer is as bright and beautiful as these summery gifts and hope you enjoy using these bold wrapping ideas as much as we do!

-Sarah and Emily


We are sisters whose goal is to have it all…balanced, organized and beautiful lives on a tight budget. Join us on our blog, Boxwood Clippings for daily tips on design, organization, bargains, DIY’s and much more


Wednesday, July 10, 2013

DIY Clay Chalkboard


For my summer handmade gift exchange I really wanted to recreate the look of these Anthropologie Take Note Ceramic Chalkboards. I just thought they would be fun to use for parties, holidays, hanging in an office, by a nightstand... the possibilities are endless! 


You Will Need:


Start out by rolling and kneading out your clay. It's pretty hard to get out every single air bubble but I think some small imperfections add character. When you are ready cut out the clay to the shape you want and put it on a cookie sheet. 

Then you will want to stamp whatever you wish at the top of your clay piece. I wanted to mimic the Anthro Chalkboard so I stamped "take note" into my clay. 

If you want to hang your chalkboard sign then make sure you stamp two holes into the clay for the wire. I just stamped them with the tip of my pen.  

Bake the sign at 275 for 15-30 minutes. 


You have to be really careful when baking to not over-bake. You want to bake it until it is hard enough to keep it's shape but not too long that it starts to turn brown or yellow. I found that my signs never really got too hard. However, this makes it so they are really flexible and won't break easily which I thought was nice. I lightly sanded the edges to smooth out any rough parts. 

Take your wire and string it through the two holes to create a way to hang your sign and then using your Sharpie pen color in the stamped words. 

All that's lef to do is paint them with a couple of coats of chalkboard paint. I just used painters tape and taped all the sides about 1 inch all around. After the paint has dried season your chalkboards by rubbing chalk all over them and then wiping it off with a damp cloth. This will prevent the chalk from leaving permanent marks once the signs start being used. 


I find that there is always a use for my little chalkboard.


These would also make great gifts. They would be cute for Christmas with a little Holiday quote or drawing too! 

Thursday, May 2, 2013

Simple DIY Mother’s Day Planter Gift


I have another great printable and DIY idea for you Mom today from Sarah. She has come up with the most adorable planter idea for Mother's day. The printable can easily wrap around your planter and really personalize your gift! 

* * * * * * * * * * * * * * * * * * * * * * * * * * * * * * * * * * *


Mother’s Day is just a couple weeks away and like many of us, I want to show my mom
how much I appreciate her. If you’ve already given your mom flowers, bath products,
and chocolate in Mother’s Days past, here’s a new idea—gift your mom a potted plant in
a festive, up-cycled container!


All you need to do is download and print out the label of your choice then follow these
simple steps:

Supplies:
• Small house plant (I choose this succulent because they require virtually no upkeep
and do great indoors)
• Metal tin (I used a metal tin that a cookie mix came in, you can also use any type of
metal can or you can purchase a similar metal tin)
• Drill and large bit or a hammer and nail
• Handful of large rocks, used for drainage
• Potting soil
• Printable Mother’s Day labels (download below)
• Printer
• Scissors or paper cutter
• Double-stick tape

1. Gather all the above supplies.
2. Drill a hole in the bottom of the tin to allow for drainage. If you don’t have a drill, you
can also use a large nail and a hammer to punch a hole.
3. Place some large rocks in the bottom of the tin.
4. Add the potting soil to the tin. Remove the plant of the container it came in and place
it in the tin. Add some more potting soil around the plant.
5. Print out the label of your choice and use scissors or a paper cutter to cut it out. If
necessary, trim it to fit the metal tin. Use double-stick tape to adhere the label to the
metal tin. Now you’re ready to give it to mom!


Hi, I'm Sarah and I'm a graphic designer who loves creating things. My blog, Sarah Hearts, is where I celebrate all things lovely because I believe so much joy can be found in the little details of life.

Thursday, April 18, 2013

Custom House Portraits by Michelle


Buying a home can be a huge step in life. It can make you feel somehow grounded and extremely hopeful at the same time. Grounded in a sense of permanence and hopeful for a fresh start and, if you're like me, a brand new design to life with a fresh palette and a clean canvas.

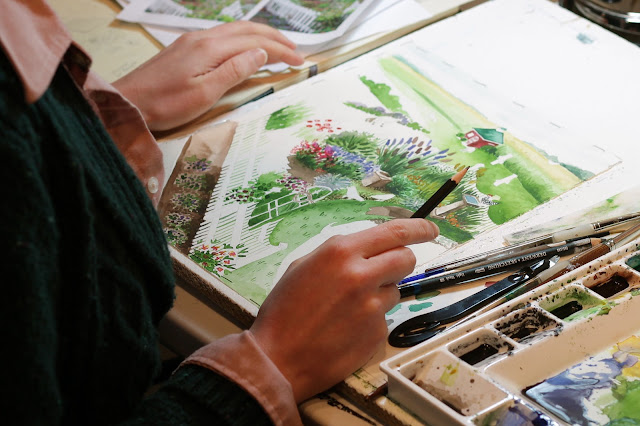
It takes time to decorate a home just the way you want it and to track down artwork that fits your style and budget. There's something so special about buying art that's personal and seeing it every day in your home. Personalized art also makes for an exceptional one-of-a-kind gift for someone you love. That's why I wanted to share with you the artwork of watercolor painter Michelle Schneider. Her colorful and whimsical style is both creative and eye-catching and makes for a beautiful addition to any room in your home.


I had her paint an 8x10" house portrait as a gift for my friend. I can't wait to give it to her! Michelle made this video to show the process of the portrait.

Some people are seriously so talented!


Here is how my friend's house turned out!


I have spent many hours in my friend's front yard, on her front steps and in her home so this painting is special to me too. It captures the happy feeling that I have every time I enter her home. 

Michelle doesn't just create pieces she loves she creates art that is special to people and tells a story. If you want to see what I mean you have to read this precious story. 


Michelle created these bird paintings as part of her twelve bird challenge which you an read more about here. 


You can purchase your own house portrait or browse her large collection of artwork (both prints and originals) available in her shop. Mother's Day is right around the corner so be sure to get your order in soon to make sure you have it in time! You can also follow her blog or on Instagram to see more sneak peeks into her studio.

Monday, December 10, 2012

6th Street Gift Guides for Kids


 I'm back with another fun gift guide! This time I'm focusing on fun items for the adorable children in our lives. 

Here are my personal picks for kids:

1. 2. 3. 4. 5. 6. 

 Here is my sponsored gift guide for kids. Each of these products has been picked by me from numerous gift guide submissions from sponsors. I hope you find something your children would love! 

1. 2. 3. 4. 5. 6. 


Rockey Paper and Design makes special paper goods and designs for every occasion. I especially adore these customizable lunch boxes. They come in a variety of styles and colors. 


There is even a little chalkboard inside that you can write a sweet note to your child on. 

*Please note that the deadline for ordering these lunch boxes before Christmas is December 11th! So order now!!*


 I love this whimsical oil painting and isn't the name so sweet! 

Not only does Tawna have beautiful oil paintings for sale but she also does custom paintings from your kids' artwork! 

I think this is the cutest idea. Imagine how excited your kid would be to see his drawing turned into a real work of art. 


How sweet is this print from Wicked Paper? I think it would look good in any room, boy or girl. Wicked Paper has an amazing selection of prints for children's rooms. 


Pin my Travels sells customized, pinnable maps that enable your children to document all of their travels. I think this is a great way to teach your children about geography and it's also really fun for them to be able to pin where they go in the world. 


What kid wouldn't love their own ring toss game! This game from Ella Lou is made from 100% natural European wool and is made by Dutch and Belgian mothers who work from home. Since this ring toss is soft it's great for a playroom or kids room! 


Judy Kaufmann is the designer behind Print and Prints. Her posters and prints are colorful and whimsical. 

Her work would look great in your child's room and make a perfect gift for any kid. 
Another gift guide coming later in the week! 

Thursday, November 29, 2012

Handmade Gift Exchange

A couple nights ago my good friend Camilla put together a handmade gift exchange. We each came up with a craft to make for 9 other girls and then we got together and exchanged them. We had such a fun time laughing, eating good food and oohing and ahhing over all the creative gifts. 
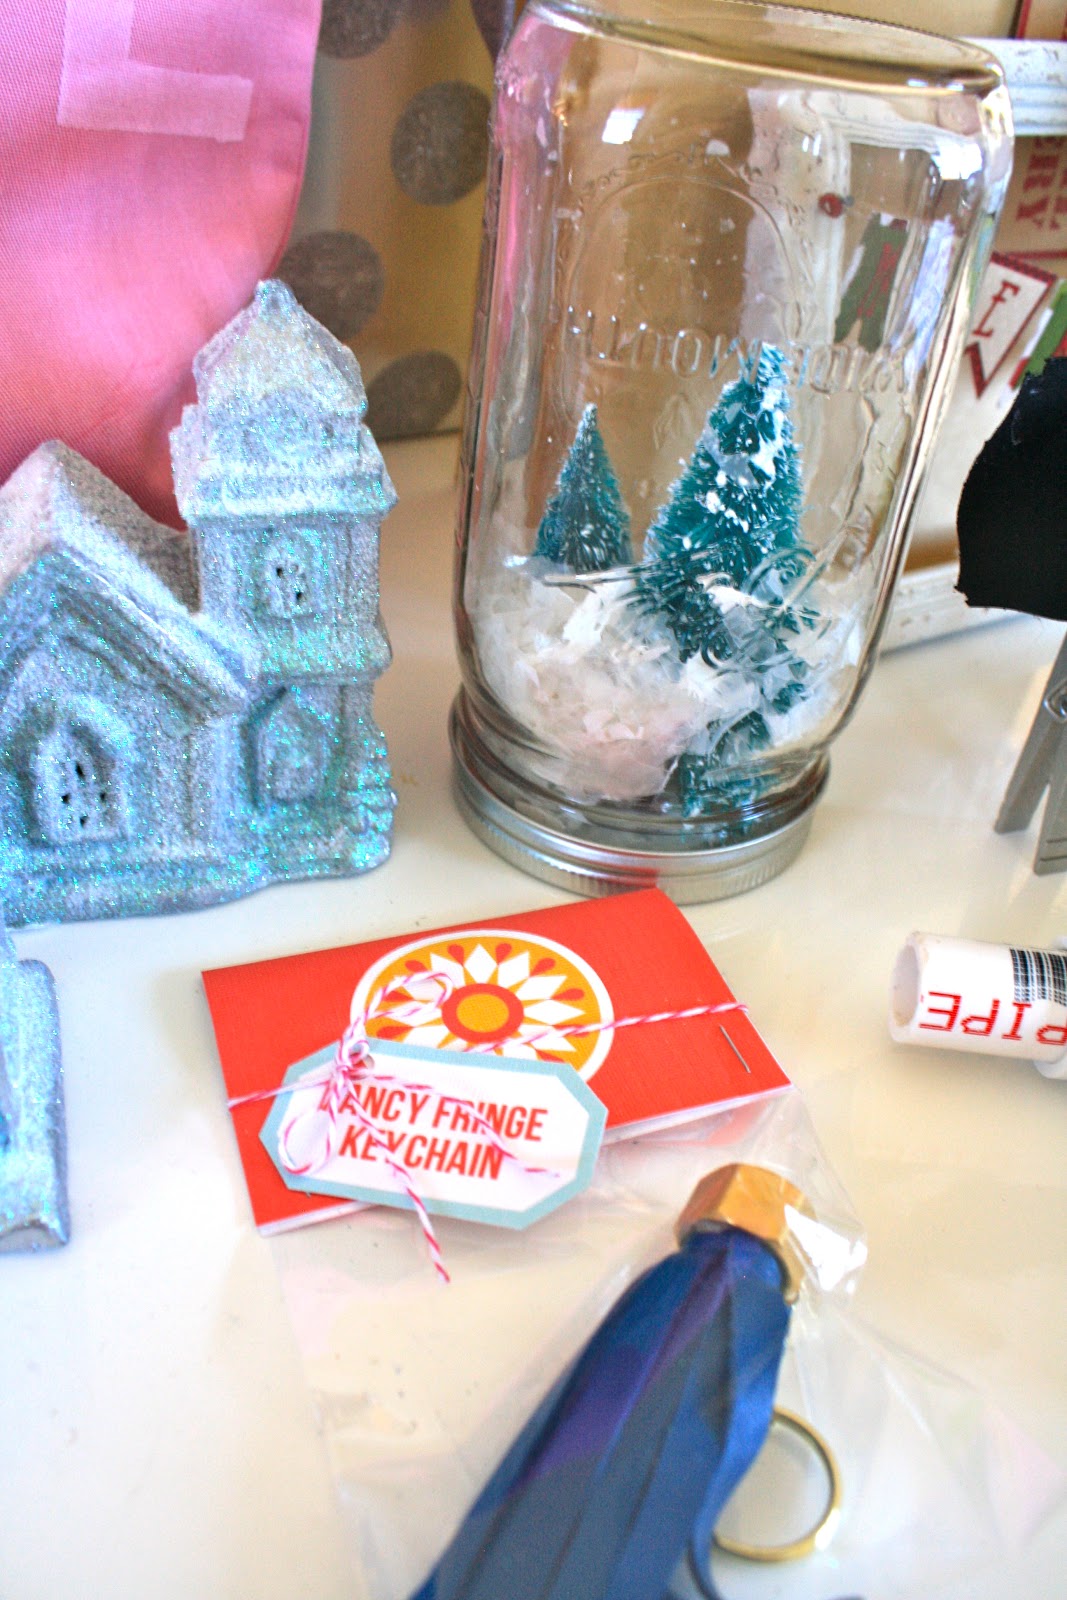
I made these leather tassel keychains. 


I found all the instructions on how to make it from Susan and Alison's Hip Handmade Holiday book. Available for purchase and download here. 


This book is amazing and it has so many great gift ideas in it. 


I loved how it has all the labels you need for packaging so all I had to get was some cellophane bags and bakers' twine and I was good to go! 

I purchased the metallic and colored leather from TexHas on Etsy. 


The leather was the perfect size for these keychains! I just trimmed a little from off the top. 

This gift exchange was so much fun I think we are going to try and do it a few times a year!