Friday, March 29, 2013

Feature Friday: The Long and Short of It

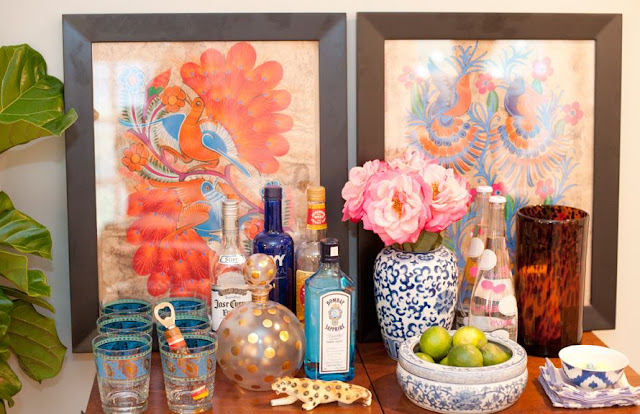
I am really excited today to be sharing the beautiful home of blogger Jessie Short with you today. She blogs about fashion, design and all the pretty things she's loving over at her blog, The Long and The Short of It

Enjoy! 

L I V I N G   R O O M


D I N I N G   R O O M


K I T C H E N


D E N 

B E D R O O M


Thanks so much to Jessie for sharing her home with us! Make sure you check out her blog here

Go here to check out past Feature Fridays

Photos by Cyn Kain

Thursday, March 28, 2013

Spring Handmade Gift Exchange


This week my friends and I got together and had another fanatic Handmade Gift Exchange. You may remember when I blogged about our exchange during the Holidays. This time it was all about Spring gifts. I was overwhelmed with happiness to see all the creative crafts my friends came up with. Here is a little tour of my loot! 


My friend Ashlynne made some adorable spool magnets. Check out this tutorial to make some magnets of your own! 


My cute friend Lisa hand painted a watercolor quote for each of us. Love it! 


You can't go wrong with a succulent! I love them. My friend Erin planted us each our own in these cute bowls


Katie made us each a honey body scrub and filled a notebook with her favorite quotes. 


Kim created a really cute paper spring banner. 


Trisha made custom fabric bunting banners for each of us!  


Shyla created a fun anchor using her silhouette machine and washi tape similar to this method


Kathleen made us each our own bath soaks using essential oils. 


Camilla made each of us our own Moss Monogram Door Sign. You can get instructions on making your own here

So here is how the handmade exchange works:

There are 10 of us in the group so we each make 10 of the same gift. Then we get together and exchange so we go home with 10 different gifts! The exchange is a blast. We each talk about what we made, how we made it and why we made it and then pass it around. There is always good food and lots of laughter!

I'll be posting what I brought to the exchange next week so stay tuned! 

Wednesday, March 27, 2013

How to Add Ric Rac to a Pillow

Today we have a great pillow tutorial from my newest contributor, Brittany! She is constantly coming up with great projects on her blog, brittanyMakes

* * * * * * * * * * * * * * * * * * * * * * * * * * * *

Hello everyone! First let me begin with a big THANK YOU to Kirsten for asking me to be a part of the contributor team.  I can't express how humbled I am with this opportunity.  
We're going to kick it off easy with a tutorial incorporating two of my favorite decor accessories - pillows and gold!  This is an easy-sew envelope pillow tutorial, which I think you'll find a relief because sewing zippers into a pillow can be a challenge.  How are we incorporating gold, you might ask? Great question! We're going to use your run-of-the-mill gold ric rack and sew it along the edges of the pillow to create a scalloped edge trim.  This look is so clever, easy, and chic!


Materials for this project: 
-1 yd fabric of your choice
-9 yds gold ric rack (or 3 x 3yd spools - I bought mine from Michael's and JoAnn's)
-sewing machine
-L shaped ruler
*this tutorial fits a pillow form measuring 26"x26"


Cut List:
-1 square piece of fabric measuring 25"x25"
-2 rectangle pieces of fabric measuring 25"x16"

~Follow these 5 easy steps to make this scalloped edge pillow~


STEP 1: fold the fabric right-side in, measure using the L-shaped ruler
STEP 2: cut your fabric per the diagram
STEP 3: to make the envelope - take the two 25"x16" pieces of fabric and sew a 1/2" hem on the inside edges.  Then, overlap these two pieces and place right side down on top of the square 25"x25" piece 


STEP 4: lay the gold ric rack between the two layers of fabric and pin in place
STEP 5: sew a 1/4" seam around the fabric and lift the top layer as you go to make sure the ric rack stays in place.  flip the fabric right side out, and voila! You have a scalloped pillow cover!


As I mentioned, I'm a big fan of pillows an gold accents! What I love most about this project is how simple it can be to add a bit of unexpected flair to a project, which in this case makes an otherwise standard pillow something very special. 

I hope you enjoyed this tutorial, and I can't wait to return with more in the future.  Thanks again Kirsten!


Learn about all of my great contributors on my Meet The Team Page


Hi! I'm Brittany from the blog brittanyMakes, where I journal my adventures in DIY projects ranging from everyday home decor to handmade jewelry, from tips in photography to stories of bulldogs, and everything else in-between.   I am a fierce accountant by day and a zealous DIYer by night.  I spend my time balancing my love for home decor and design with the everyday responsibilities of my corporate day job.  My main mission is to inspire my readers to do what they love, take risks, and above all, to exercise their creative muscles!

Tuesday, March 26, 2013

Sweet Little Peanut Photo Shoot & Easter Egg Hunt


Last Tuesday we were excited to be a part of a photo shoot for Sweet Little Peanut featuring Oh Cozy Knits' Headbands and Colin's Closet Bow Ties


Jett and Jane were the cutest little models. 


Jett was extra excited to have his best buddies Roman and Sawyer at the shoot.  


Little boys in bow ties just melt my heart. 

Jane also got to show off a cute Oh Cozy Knit headband. 


And all of her girlfriends were there showing off their headbands as well. 


Kids. 

You can see all the cute pictures on Jessie Alexis' blog here and here

We were also excited to attend an Easter Egg Hunt for Sweet Little Peanut last Saturday at Pottery Barn Kids


Jane stayed busy eating everything in sight including this poor doll. I guess I'm also off the hook for this Sunday because all day Saturday Jett kept saying, "That was the best Easter ever!"

Easter Egg Hunt pictures taken by Jessica Kettle for Sweet Little Peanut. 

Monday, March 25, 2013

Last Week's Links


1 | Hurry Hurry as fast as you can to check out Caitlin Wilson's new textile website and Spring line!!
2 | This might be the cutest dress I have ever seen.
3 | My friends and I took the kids to see The Croods on Saturday. LOVED it!
4 | Everyone needs a great floral top for Spring.
5 | Great post on what to buy and what not to buy at Trader Joes.
6 | I loved these tips for a blog media kit.


7 | The incredibly talented Lauren Liess pulled together this stunning Living Room and shared it over on her blog
8 | For less than $30 this might be my next favorite bag.
9 | My kids would die if we had this cute Circus Tent.
10 | This pretty skirt would be perfect for Easter!


top photo- Caitlin Wilson Textiles / bottom photo- Pure Style Home


DISCLOSURE: COMPENSATED AFFILIATE LINKS USED